CLICK HERE FOR FREE BLOGGER TEMPLATES, LINK BUTTONS AND MORE! »

Monday, July 9, 2012

Chocolate and Blueberry Oatmeal Blondies


I always like to end/start the week with a big, home-cooked meal when we can. It's a nice way to cap off the week and put myself in a good mood for what the next 7 days will bring. And, we've been watching MasterChef season 1, so we're both on this "I can cook better than you" kick. Joey was in charge of the entree (mango coconut Chilean sea bass...he wins. It was amazing), and I had the dessert. I was in the mood for something fatty and completely unredeeming, whereas Joey wanted something light and fruity. So...this dessert sort of meets somewhere in the middle, in that it does have fruit in it, but is still totally fattening and probably not very healthy. Win-win.

I would love to have you believe that after many, many tries in the kitchen, mixing the perfect ratios of baking ingredients that I perfected this recipe I'm about to share with you, but that would be a lie, and what kind of a blogger would I be if I started lying to my audience? (Probably a very good one, actually.)

I found the recipe on my favorite place to search for recipes, allrecipes.com. Like a lot of recipe websites these days, all the recipes are user-reviewed, so I usually just search for the highest-rated version of whatever I'm looking to make, read some of the user comments for modifications and go about my business. It's rarely led me wrong.

Here's the link to the recipe I'm about to share:

Chocolate and Blueberry Oatmeal Blondies

Ingredients

Not pictured: Salt. Dammit! Don't forget the salt!
  • 1 cup butter at room temperature (I melted mine...shhh, don't tell!)
  • 1 cup firmly packed light brown sugar
  • 1/2 cup white sugar
  • 2 eggs
  • 2 teaspoons vanilla extract
  • 1/2 teaspoon salt
  • 1 teaspoon baking soda
  • 1 teaspoon baking powder
  • 1-1/2 cups all-purpose flour
  • 2 cups rolled oats
  • 1/2 cup chocolate chips
  • 1/2 cup fresh blueberries

 Directions  

  1. Preheat oven to 350 degrees F (175 degrees C). Grease and flour a 9x13-inch baking pan.  |
  2. In a large bowl, beat the butter, brown sugar, and white sugar until thoroughly mixed and creamy. Beat in the eggs, one at a time, mixing well after each addition. Stir in the vanilla extract until well mixed, and mix in salt, baking soda, baking powder, flour, rolled oats, plus chocolate chips, raisins, and chopped nuts if desired. Mix well to moisten all ingredients, and spread into the prepared baking pan.
  3. Bake in the preheated oven until golden brown, 20 to 25 minutes. Let cool in the pan for about 5 minutes before cutting into bars. 
  
Okay, so those are the basic directions. After you mix together all your ingredients, your batter will look something like this:
It's pretty thick, and to be honest, I was worried it was going to be too dry. I'm used to making quick breads, and my batter is usually thin enough to pour into a pan. This batter will not be like that. Spread out in your 9x13 pan, it looks something like this:
The directions say to bake it for 20-25 minutes, but after 25 minutes, the center was still kind of gooey. I can't say if this is from the fresh blueberries adding extra, possibly unneeded moisture to the batter, or if it just needed more time to bake. A commenter on the original recipe suggested turning down the heat to 325 and baking for a few more minutes, so that's what I did. Aaaaannnnddd after like 6 more minutes of this, it still felt gooey, so I covered it with foil to keep the edges from burning and let it go another 5 minutes. All told, it was probably in the oven for 40 minutes, which seems like a more appropriate cooking time for something this dense. 
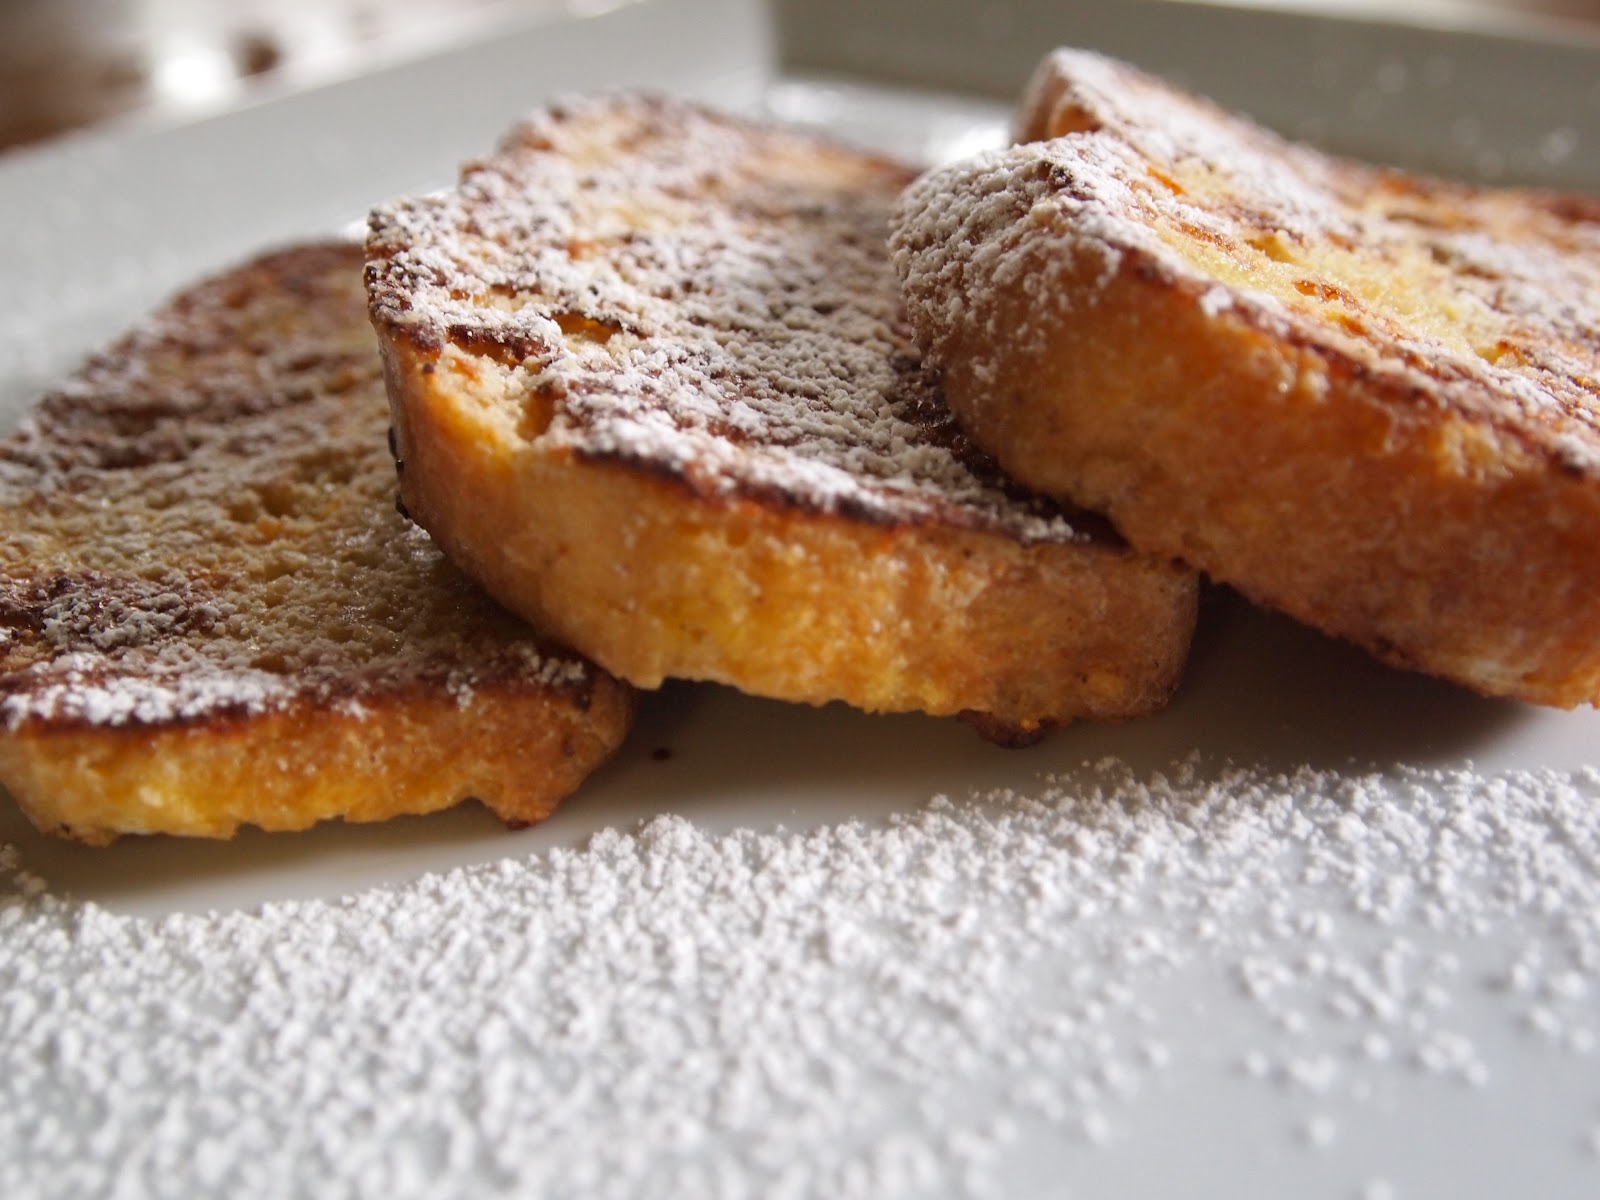
As usual, I had a hard time waiting for this bad boy to cool down before I cut into it and "sampled" it. (Hey, I'm feeding this to my family- I have to make sure it's edible and all...). It's thick and chewy, just like how you'd want a brownie to be, and the blueberries and chocolate chips compliment each other nicely. It's not a joke when I say that between my husband, my kid and me, we ate half the pan last night (okay, so the baby only had a small bite, but it makes it sound less gluttonous when I say 3 people ate it instead of just 2). It made a great breakfast this morning, too. 
This is definitely on my list of "must make this again when I'm feeling fat and sassy." We agreed that fresh raspberries would be awesome in this in place of the blueberries, which is something I'd like to try. I also think dried cranberries would be pretty good. One of my most favorite cookies is a chocolate chip dried cranberry oatmeal cookie, so I can't see how that combination wouldn't work in a blondie. 
Yum.
 What's your favorite dessert combination? Have you made blondies with other mix-ins? I saw a lot of beer blondie recipes- how do those turn out?


Friday, July 6, 2012

Easily Decob Corn on the Cob

The picture says it all, really.
no muss, no fuss.

Thursday, July 5, 2012

Summer Vegetable Tabbouleh Salad


I know, I know... you're thinking, "This is SO not tabbouleh. This woman doesn't know what she's talking about. Where's the mint? Where's the parsely? SHE'S A LIAR!" Well, fine; you got me. This is not a recipe for traditional tabbouleh. If you're looking for that, I'd suggest you go check out this website called "google." This is, however, a delicious, healthy summertime salad that looks impressive at parties. All your friends will think you either spent a lot of time making this, or a lot of money buying it at Whole Foods, but you and I know better. It can be our little secret.

For those of you thinking, "I can't cook! I can't make this!" I'm here to tell you that's nonsense. If you can boil water, chop veggies and read directions, you can make this. I'll even walk you through it. The whole thing will probably take you less than 20 minutes. YOU CAN DO THIS.

Not pictured: Sugar.
Ingredients
1 cup uncooked bulgur wheat

Veggies:
1 ear of corn (or 1 can, if fresh is unavailable)
1 bell pepper (I chose an orange one for color, but any of them would be delicious)
1/2 hot house cucumber (I don't like seeds. I don't like cucumber peel, either.)
1/2 jalapeno (add more or less depending on your ability to tolerate spice)
2-3 scallions
handful of garden tomatoes (or 1 large tomato, depending on what's available)
(You can substitute any of these for veggies you have on hand, but these are my favorite)

Dressing:
2 tbsp lemon juice
2 tbsp Olive Oil
1/2 tsp salt (I have coarsely ground shown, but any ole' salt will do. If you have sodium restrictions, just salt to taste.)
1/4 tsp sugar
Pepper to taste
 
Here's how to do it:
1. Add 1 cup of uncooked bulgar wheat + 2 cups water to pan, bring to boil. Reduce heat to simmer, cover, let simmer for 15 minutes. Set your kitchen timer- by the time the bulgur is done cooking, you will probably be done with everything else.

2. During this time, shuck your corn and get it cooking. I cooked mine in the microwave in a shallow dish with some water, covered, for 8 minutes. When it's done cooking, stick the smaller end of it in the middle of a bunt pan for easy decobbing. I learned this from Martha Stewart a few years ago and it is one of those tips that has changed my life.


3. Chop up your veggies! I tend to chop mine on the smaller side, because I'm used to feeding my 13-month old son, and I want him to eat the food I serve him, not choke on it. A rough chop will be fine for all of these, except the jalapeno. I would dice that as small as you can. I only used half the jalapeno, but I am a complete spice wuss. If you are the type of person who eats sriracha with a spoon, then go ahead and use the whole thing.

4. Add the dressing ingredients directly into the bowl with all of your chopped veggies. If you are getting your lemon juice directly from the lemon, I would advise squeezing it into a separate bowl and then adding it to your mix. That way, if any lemon seeds get squeezed out, you can fish them out immediately instead of searching through your beautiful salad looking for a stray lemon seed. I'm speaking from experience, unfortunately.
Pictured: Lemon seeds. Evil lemon seeds.

5. Add your cooked bulgar wheat directly to the bowl. You don't have to wait for it to cool down, but you can if you want. Mix everything up, let chill in your fridge for a little while...if you can wait that long. (I couldn't.)

And that's it! I made a version of this for my parent's 4th of July party and it was a big hit. I made it again this morning for the purposes of this very blog, and my husband and I ate almost the whole batch for lunch. It's one of those foods that you don't feel bad for indulging in, because it's light and healthy. Definitely a must-make. Try it and tell me how you like it!


Thursday, June 28, 2012

Chocolate Prune Bread

Man, do prunes have a bad reputation. Tell people you've made a chocolate prune bread and they wrinkle their noses and ask, "why prunes?" As if prunes were the most disgusting, vile fruit on the planet. I think it has something to do with reminding people that they'll eventually get old and need to eat prunes in order to, ya know...make doody. Actually, any fiber at all will make your intestines flush themselves out, and prunes just happen to be a delicious way to get the job done. So stop being such a ninny about prunes. They're delicious, they help you poop, and they are the perfect accompaniment to the soft, sweet challah dough and bite of semi-sweet chocolate chips.

This is one of the more challenging breads that I've made because there are several steps involved. Instead of mixing the chocolate chips and diced prunes directly into the dough as it's being made, you prepare the dough ahead of time, chill it and roll it out like you were making a pizza, and then add your sweets. It's not difficult, per say, but any time you add more steps to a project, you increase the likelihood that one of them will go disastrously wrong, or if you are me, you will forget a step altogether.

Here's how it goes though.
Step 1: Make your challah dough. Again, I used the recipe in the book Artisian Bread in Five.

Side note: If you are at all interested in learning to make your own bread (and you really should, because it's much easier than you think!!), this is the book to get. All of their recipes are no-knead, and most of them you can make with ingredients you already have in your kitchen (except maybe the yeast, but that's cheap and easy to find).

This is not a difficult step. Follow your recipe, don't overmix, and let your dough rise for at least 2 hours. I let mine refrigerate for several days before I used it, but I would assume a few hours would be long enough- it's easier to work with when it's chilled, so I would not recommend skipping this step.

Step 2: Roll out your dough to 1/2" thick, as if you were making a pizza.

Step 3: Prepare your filling. I used Nestle semi-sweet chocolate chips, which I gave a rough chop to. You could leave them whole, but I wanted my chocolate to be more evenly distributed. I also chopped my prunes, but they tended to stick together anyway. Spread your chocolate and prunes on top of the dough evenly, then roll up like a burrito.

The book suggests kneading the dough to work the filling throughout the dough, but I think just rolling it up and shaping it into a loaf is good enough. You end up with this beautiful swirl of chocolate and prune throughout, much like a cinnamon-raisin bread. I did an egg white wash and then sprinkled liberally with cinnamon sugar.

Step 4: You have to let your dough rest for an hour-twenty, then you bake it for another 45-50 minutes, but when it's done, it will look something like this:


Confession time: this is the second loaf of bread I made with this recipe. The first loaf turned out equally as pretty, and I shared a slice or two (okay, three) with my mother in law and son. And then we went shopping. And left the bread on the table. With the dog out. Yeah...she ate it. I was so angry with her!! This bread is delicious, and man, was I looking forward to pigging out on it when I got home. But, really, can you blame her? If I were a dog, I'd eat the rest of it, too.

And that's the great thing about making dough ahead of time and keeping it in your fridge. If I had to start over from scratch, I would have to wait 2 hours for the dough to rise, let it chill for at least an hour, then prepare the dough with the filling, let it rest another hour and a half, then bake it for approximately another hour. That's 5 and a half hours. Too long. I just took my dough out of the fridge and cut my wait time in half.


The verdict? This bread gets a 10/10. Two thumbs up. A gold star. It's really, really delicious. The challah dough is soft and chewy, with a nice crispy crust. Paired with chocolate, the prunes are a nice sweet touch. It's a real winner. And it looks so impressive, too. Everyone in my family should expect a loaf of this for Christmas. (spoiler alert!!)

Sunday, June 24, 2012

Lemony French Toast


 I love big, heavy, "I need to take a nap after eating this" breakfasts. But, I also enjoy fitting into my clothes, not wheezing when I breathe, and you know...not having diabetes. So, as much as I love them, I don't make big breakfasts that often. Today was one of those days.

I've been on a big bread making kick lately, and yesterday I made a double batch of olive oil bread. I like olive oil bread a lot. It's heavy, but not like a brick heavy, chewy, soft and moist. It's good with just about everything. Recently, my mom gave me a small bottle of lemon-infused olive oil from The Olive Tap. I thought, "hey, wouldn't a lemony olive oil bread be just the greatest thing in the world?" so instead of regular extra virgin olive oil (btw, I refuse to say EVOO. Refuse!)

As just a loaf of bread to have with dinner or a snack (with my homemade butter), it was just so-so. Kind of a let-down, to be honest. I was expecting this full-on lemony bread, but since my recipe only calls for a small amount of olive oil (1/8 cup for 2 lbs of bread), the lemon flavor was pretty subtle. Joey tried it and said it tasted like it couldn't decide if it wanted to be a dessert bread or a dinner bread, which is pretty accurate. Not sweet, not savory. Just...ok.

So this morning, I was dreaming of a big breakfast. Deciding we probably weren't going to eat the rest of the bread by itself, I figured I had nothing to lose by making french toast out of it.

I sliced it pretty thick, used eggs and heavy cream as my batter and fried it butter I made yesterday. There's something very satisfying about making food from scratch. I know pioneer women used to do this every day as a matter of survival, but in my 21st century kitchen, it feels pretty good. (In my dreams, we live in an old farm house with a garden out back and I have some chickens and a cow and a goat. And a duck, because ducks are hilarious.)

The result was much better than I anticipated. The subtle lemon flavor I was lamenting earlier was just enough flavor, and coupled with the french toast-y-ness and some powdered sugar, it was a delicious breakfast. It didn't last very long, though. 3/4 of a loaf of bread was fried up, (photographed) and shared between myself, my husband and my toddler, and all I have left to show for it is an extremely messy kitchen and some fat, happy faces. There are worse things in life, I guess.


 As french toast, I give this an 8/10. As regular-ole bread, it gets a sad 5/10.

Saturday, June 23, 2012

Adventures in Butter-making!

I read this post about making your own butter on the excellent DIY Natural page the other day and decided to try it for myself! It really is as easy as they say, and dare I say... fun?

Anyway, here's how it goes:
I bought a bunch of ball jars at the beginning of spring, right around the time we decided to join a CSA, in anticipation of all the fresh veggies I'd eventually need to can to keep from spoiling. So far, I've canned a whopping two things- apple butter (which was actually quite delicious, but we ate it so fast, it didn't even need the official vacuum-canning process). So I have a lot of jars laying around the kitchen just waiting to be used.

Step 1: Grab a jar and some heavy whipping cream. I bought a half-gallon of organic Horizon cream at Costco for $6.79.

 Step 2: Fill it with heavy whipping cream. I tried this last night and I filled the jar almost up to the top. This is not a good idea. You need some headroom for the heavy cream to expand during shaking. I ended up having to pour about half of my cream out to finish the job (don't worry, I saved it and made a second batch). So, for the half-pint ball jar, I poured in about a cup to a cup-and-a-quarter. I wasn't really paying attention. If you are planning on making butter for your baking needs and require a specific amount, I would recommend making more than you need.


Step 3: Shake! Shake! Shake!

I timed it this morning, and for my cup of heavy cream, it took me about a half-hour to make butter. This includes getting up to check on whatever mischief my 1 year old son was getting into, and stopping to take pictures. You could probably do it in about 20 minutes. If you used a stand mixer, you could probably even walk away and do something else, but where's the fun in that? Plus, it's really satisfying watching the cream go through different stages and finally turning into butter.

Last night, however, I went through a moment of panic like, "what if I'm doing this wrong?" I had posted on Facebook that I was planning on making butter, and my mom commented that she used to do this with her 4th grade class (she's now retired). So I gave her a call and was like, 'Am I doing this wrong?" Wise as ever, she told me there's really no wrong way to do it, and just keep on shaking! So shake I did. 

whipped cream. keep shaking!

Eventually, the butter and the cream will start to separate and you'll have a clumpy, milky mixture. You can pour off the milk and drink it or save it for recipes. It's pure buttermilk, which I am forever having to fake by pouring lemon juice into regular milk. I'm excited about having a small jar of it in my fridge for recipes like...buttermilk bread! Or pancakes! Mmm, pancakes.

buttermilk!

Anyway, after you pour off all of the buttermilk, you're left with...butter. I took mine out of the jar and put it in a smaller container, gave it a rinse and then put it in the fridge to chill. You can add salt to your butter if you like, but I think there's enough flavor in it that you don't need to. Plus, now I have unsalted butter for making food for my son.


And that's how you make homemade butter. My husband says he wants all our butter made this way now, which is a great idea, but I told him he'd have to do the shaking. Plus, sometimes I need like a pound of butter. I'm not going to spend an hour shaking a ball jar before I start baking. And I haven't costed it out, but I'm pretty sure bulk butter from Costco is going to be cheaper.

Buuuut...I can see myself making homemade butter for Thanksgiving. It's such a nice treat.

Thursday, June 21, 2012

Olive-Olive bread

First of all, a confession: I'm not really that crazy about olives. Ok, I like kalamata olives, but pretty much all other varieties make me want to puke. Black olives in a can? Yuck. Green olives? Blech! Green olives stuffed with something else? Forget you.

Back to bread. I've made bread with olive oil in the dough before, and have liked it pretty well. The crust is crispy and chewy and oily. The crumb has a nice, moist texture to it. I've had bread with kalamata olives mixed in before, too, albeit about 15 years ago now, but my memory is sharp enough to recall vaguely liking it. Or something.

On a trip to my local meijer to pick up stuff for my husband to make a fancy dip, I noticed a small jar of kalamata olives on sale for $1. "IN THE CART, YOU!" I shouted. Now, for a word of warning: If you are going to go to the trouble of making a loaf of bread from scratch, by hand and not in a bread-machine, please, for the love of god, do not use $1 olives. As the ever-wise judge Marilyn Milian of the People's Court always says, "the cheap comes out expensive."

Ugh. Even the label looks cheap. I really, really should have known better.
It's not that these olives are necessarily bad, or that they taste funny, but I think olives from, say...the olive bar at Whole Foods would have been money more well spent. Also, these cheap-os are not even pitted, so that added another fun step to the process. Nothing says fun like trying to pit olives while keeping your 1-yo entertained. FUN with a capital F-U!!

Anyway, it goes like this: mix together your olive oil dough ingredients and let the dough rise for 2 hours. After two hours, come back and roll it out to about 1/2" thick, and smatter your lovely pitted and halved olives on top. Roll up your dough and olive mess and shape into a ball. Let rest in your baking dish of choice for 1 hr, then bake for 35 minutes at 450, which seemed like a really high temp.

By this time, it was nap time for the babe, and I found it very difficult to jump up and take the bread out of the oven when the timer dinged as said babe was sprawled out across my lap. So, as a result, my crust got a little...brown. Not burned, but not golden brown like they talk about in all the recipe books.

The Result:


Another note: I would have more-finely chopped the olives instead of just halving them so there are more olives per square-inch of bread space and so that when you DO get a hunk of olive, it's not so overwhelming.

The Verdict: Good. On a scale of 1-10, I'd give it a 6. Higher scores would have been awarded if not for the dark crust and huge chunks of cheap olives. Definitely on my list to make again. 

Tuesday, June 19, 2012

Square Beignets

So we had about a pound of brioche dough left over from Father's Day. We liked the brioche dough, but not enough to make another loaf of it. Last night, after a delicious dinner of Thai peanut chicken stir fry, we were in the mood for something fatty for dessert. Joey was like, "What if I rolled up that dough and fried it, like a donut hole?" and I jumped up from the table and was like "YES!"

You can use brioche dough to make beignets. They're actually pretty easy- you roll the dough out to about 1/2" thick and then, according to my recipe book, cut it into 2" squares. Let rest for 15-20 minutes and then fry those suckers. Finish with powdered sugar and you're done. Fancy donut holes.

I'd never had a proper beignet before, but I know people stop for them at like Dean and Deluca before getting on the train to go to their stockbroker job in the city or something. City life- I just don't get it. Anyway, I didn't want to get discouraged with how my beignets don't look like the ones you get at bakeries so I just went with it (p.s. it turns out they're round. not square.).

Also, for someone who spent a large portion of her life working with measurements and what-not, I'm shockingly bad at cutting 2" squares. So...some of them are like 1", some of them are 3" but most certainly none of them are 2" squared. I've seen cutting boards with ruler measurements on them- might have to add that to my Amazon christmas wish list.

The result:
See, I can't cut squares. At all.


Anyway, I know I said we made them for dessert last night. When they're hot and the outside is crispy from just being fried and the inside is still kind of doughy and gooey, they are super good. We had about a half-dozen left, so I had them for breakfast this morning with some raspberry jelly. They're still pretty tasty, but not as yummy as they are when they're fresh. Definitely an improvement on the brioche bread, but not something we'll be making on a regular basis.

Amazing News!!

From Friends of Tim:

"We got word a little while ago that today's the day - they found a heart match for Tim. There is still a lot to do before the surgery, so the procedure itself likely won't start until early afternoon. Please keep the positive thoughts and prayers coming for a successful surgery and speedy recovery."

Please keep the family in your thoughts today as Tim prepares to get his new heart, and please say a giant THANK YOU for the donor and his or her family. Organ donations truly are wonderful. If you aren't an organ donor, please consider joining the registry. It's the last and greatest gift you can give.
http://donatelife.net/

Sunday, June 17, 2012

Super Tim!

Super Tim! by ham_and_eggs
Super Tim!, a photo by ham_and_eggs on Flickr.

$5 gets you a super cute Pdt amigurumi pattern for the doll. All of the profits from the sale get donated (in your name!) to a 5 year old boy who is waiting for a new heart. Please be a hero today and buy this pattern! Go to www.hamandeggs.etsy.com to purchase.

To learn more about the awesome little boy you'll be helping, go to littletimmygrobart.blogspot.com. if you aren't moved to do something to help this amazing family, perhaps you need to have your heart examined too (because it's three sizes too small, ya grinch!).

I purposely wrote this pattern to be easy to make, so crocheters of all skill levels could make one. I would LOVE it if everyone who purchases the pattern makes and sells a doll and donated the profits to the grobarts!

My personal goal is to donate $100. I'm 40% of the way there. Help me reach my goal!

Adventures in Baking- Brioche

So for Father's Day, I told my husband I would bake him some brioche bread for breakfast. I've been on a bread-baking kick since we started feeding Elliott "real" food, and my new recipe book (Artisan Bread in 5 minutes a Day) touts brioche as the most delicious pastry dough. So, what the hell? We're fat already... let's give it a shot.

Initial Impressions:
This dough uses a LOT of fatty ingredients. I made enough for 2 loaves of bread, and I used 3 sticks of butter. 4 eggs. 1/2 cup of honey. Logic would dictate that this bread would be fricking amazing, right?

After mixing all my ingredients, the dough is a lot more like a thick cake batter than a yeasty dough. 2 hours of rise time didn't result in a lot of rise in the dough. Oh well. Into the fridge to chill overnight.

The dough is much easier to work with after chilling. It's like playdough. I quickly shaped it into a loaf and added it to my favorite bread baking pan, which is a cheap ceramic dish we got as a christmas present (I think the real present was the banana bread baked in the dish, but since my banana bread rules the world, all others pale in comparison. I kept the dish and tossed the bread.) Also, not included in the recipe but I did anyway: cinnamon-sugar for the crust.

While the bread was baking, I took a stick of butter in a bowl and put it on top of the oven. Once it softened nicely and I mixed it with some honey to make homemade honey butter. Remember how I said we were already fat? Yeah, this would be why...

So 45 minutes later the house is filled with the smell of freshly-baked bread (one of my most favorite things in the whole world). It's tough to wait for the bread to cool before slicing into it.


My husband and I liked it, but were not super-impressed with it. On a scale of 1-10 (10 being the greatest thing he's ever eaten, which I will be blogging about next... Challah bread...), he gave this one a solid 7. I said 6.5-7.

It's not that it's bad, per say... but it is awfully dense. More like a heavy piece of cake, less like a bread. I think it would make for some delicious donuts (which is actually one of the recipes in the book... might be trying that next). The honey butter is the hero of this dish. I think the bread would have been too dry without it.

So that's all for Father's Day 2012.

Related Posts with Thumbnails